C# Discord Bot!
Learn how to use C#, NuGet Package Manager, Asynchronous Tasks, and the Discord API to create functional discord bots for your server!
Getting Started
Hey guys today we will be talking about creating a discord bot using C# and Discord.NET Which you can download from the Visual Studio NuGet package manager; the most recommended way for you to install this library. Alternatively, you may also compile this library yourself should you so desire.
Supported Platforms
Discord.NET targets .NET 6.0 and .NET 5.0, but is also available on older versions, like .NET Standard and .NET Core; this still means that creating applications using the latest version of .NET (6.0) is most recommended. If you are bound by Windows-specific APIs or other limitations, you may also consider targeting .NET Framework 4.6.1 or higher.
Installing with NuGet
- Create a new solution for your bot
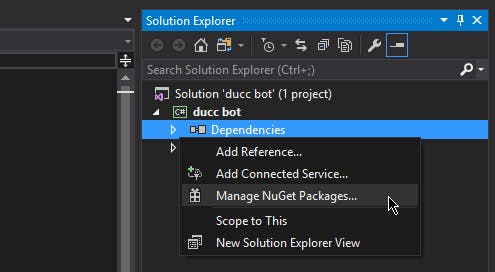
- In the Solution Explorer, find the "Dependencies" element under your bot's project
- Right click on "Dependencies", and select "Manage NuGet packages"
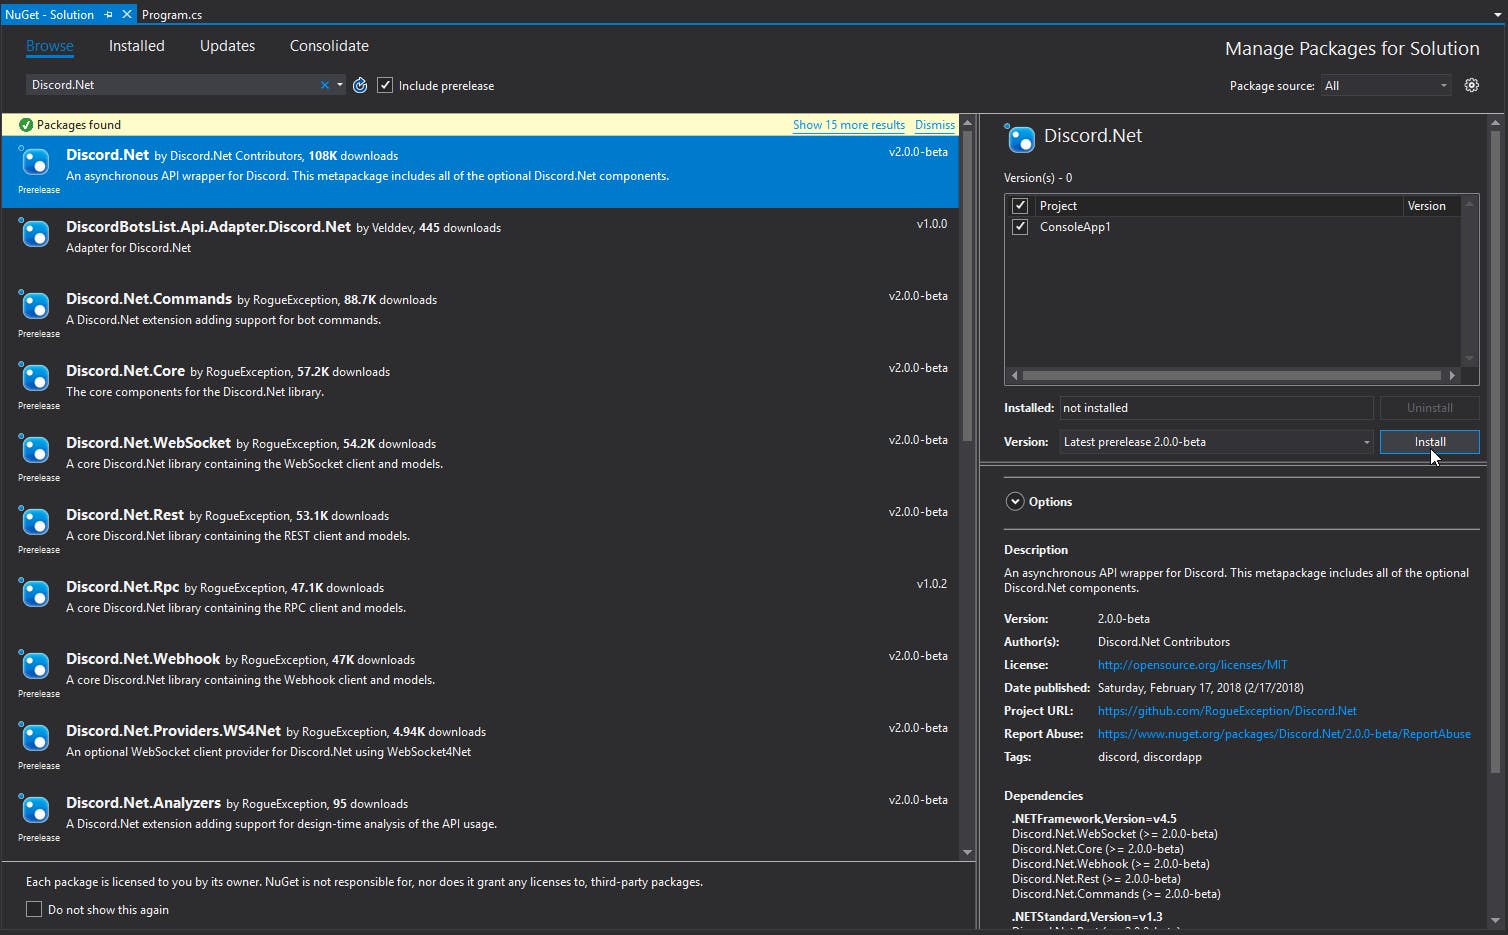
- In the "Browse" tab, search for Discord.NET
- Install the Discord.NET package
Making Your First Bot with Discord.NET
One of the ways to get started with the Discord API is to write a basic ping-pong bot. This bot will respond to a simple command "ping." We will expand on this to create more diverse commands later, but for now, it is a good starting point.
Creating a Discord Bot
Before writing your bot, it is necessary to create a bot account via the Discord Applications Portal first.
- Visit the Discord Applications Portal.
- Create a new application.
- Give the application a name (this will be the bot's initial username).
- On the left-hand side, under Settings, click Bot.
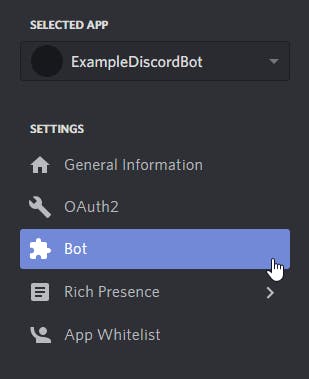
- Click on Add Bot.

- Confirm the popup
- (Optional) If this bot will be public, tick Public Bot.

Adding your bot to a server
Bots cannot use invite links; they must be explicitly invited through the OAuth2 flow.
- Open your bot's application on the Discord Applications Portal.
- On the left-hand side, under Settings, click OAuth2.
- Scroll down to OAuth2 URL Generator and under Scopes tick bot.
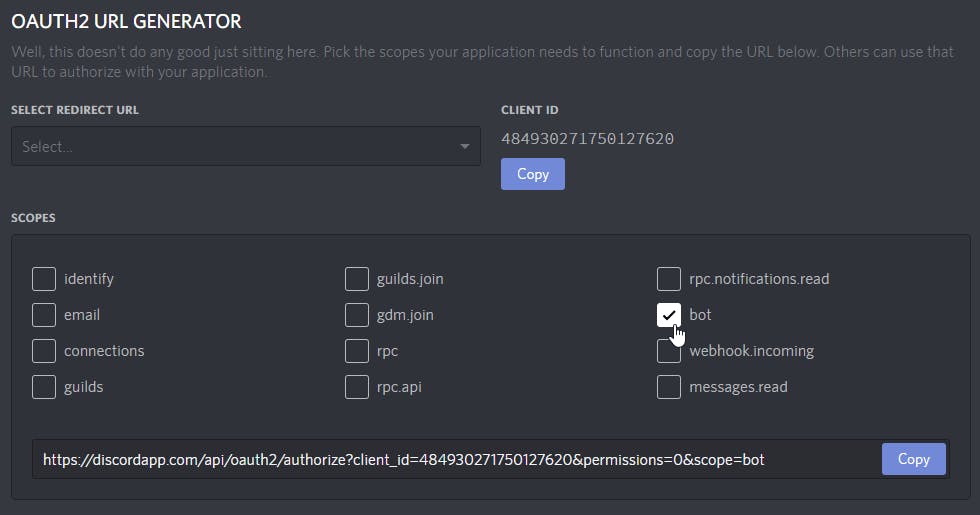
- Scroll down further to Bot Permissions and select the permissions that you wish to assign your bot with.
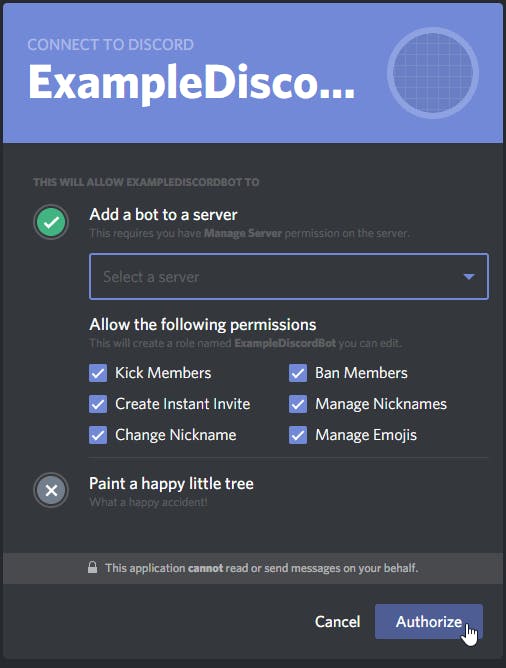
- Open the generated authorization URL in your browser.
- Select a server.
- Click on Authorize.
Async
Discord.NET uses .NET's Task-based Asynchronous Pattern (TAP) extensively - nearly every operation is asynchronous. It is highly recommended for these operations to be awaited in a properly established async context whenever possible.
To establish an async context, we will be creating an async main method in your console application.
public class Program
{
    public static Task Main(string[] args) => new Program().MainAsync();

    public async Task MainAsync()
    {
    }
}
As a result of this, your program will now start into an async context.
Creating a logging method
Before we create and configure a Discord client, we will add a method to handle Discord.NET's log events.
To allow agnostic support of as many log providers as possible, we log information through a Log event with a proprietary LogMessage parameter
If you are using your own logging framework, this is where you would invoke it. For the sake of simplicity, we will only be logging to the console.
private Task Log(LogMessage msg)
{
    Console.WriteLine(msg.ToString());
    return Task.CompletedTask;
}
Creating a Discord Client
inally, we can create a new connection to Discord.
Since we are writing a bot, we will be using a DiscordSocketClient along with socket entities. See Terminology if you are unsure of the differences. To establish a new connection, we will create an instance of DiscordSocketClient in the new async main. You may pass in an optional DiscordSocketConfig if necessary. For most users, the default will work fine.
Before connecting, we should hook the client's Log event to the log handler that we had just created. Events in Discord.Net work similarly to any other events in C#.
Next, you will need to "log in to Discord" with the LoginAsync method with the application's "token."
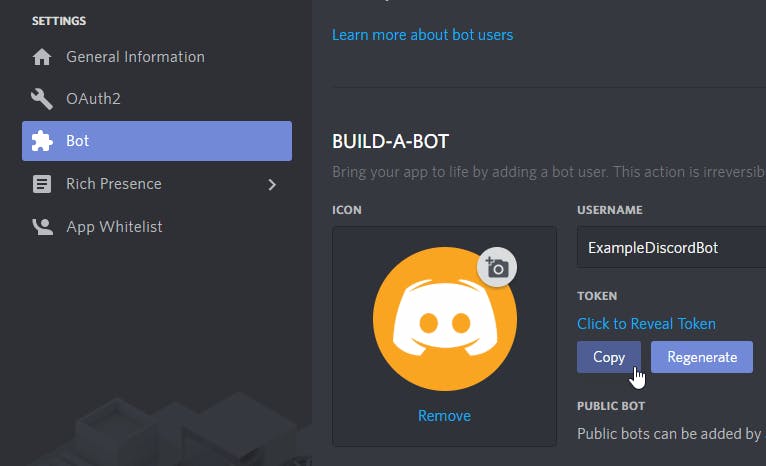
We may now invoke the client's StartAsync method, which will start connection/reconnection logic. It is important to note that this method will return as soon as connection logic has been started! Any methods that rely on the client's state should go in an event handler. This means that you should not directly be interacting with the client before it is fully ready.
Finally, we will want to block the async main method from returning when running the application. To do this, we can await an infinite delay or any other blocking method, such as reading from the console.
IMPORTANT!!
Your bot's token can be used to gain total access to your bot, so do not share this token with anyone else! You should store this token in an external source if you plan on distributing the source code for your bot.
In the following example, we retrieve the token from a pre-defined variable, which is NOT secure, especially if you plan on distributing the application in any shape or form.
We recommend alternative storage such as Environment Variables, an external configuration file, or a secrets manager for safe-handling of secrets.
The following lines can now be added:
private DiscordSocketClient _client;

public async Task MainAsync()
{
    _client = new DiscordSocketClient();

    _client.Log += Log;

    //  You can assign your bot token to a string, and pass that in to connect.
    //  This is, however, insecure, particularly if you plan to have your code hosted in a public repository.
    var token = "token";

    // Some alternative options would be to keep your token in an Environment Variable or a standalone file.
    // var token = Environment.GetEnvironmentVariable("NameOfYourEnvironmentVariable");
    // var token = File.ReadAllText("token.txt");
    // var token = JsonConvert.DeserializeObject<AConfigurationClass>(File.ReadAllText("config.json")).Token;

    await _client.LoginAsync(TokenType.Bot, token);
    await _client.StartAsync();

    // Block this task until the program is closed.
    await Task.Delay(-1);
}
At this point, feel free to start your program and see your bot come online in Discord.
Congratulations
You have successfully created a live Discord Bot using the Discord.NET library, and you are now one step closer to building a fully functional bot with commands. I will being making a YouTube series dedicated to building this exact bot and adding functionality like, commands, audio, emoji, and message response link to my channel is at the top of my blog so stay tuned!
